








이 글의 내용
이 기사 본문은 영어판을 게재합니다. 한국어 번역은 준비 중입니다.
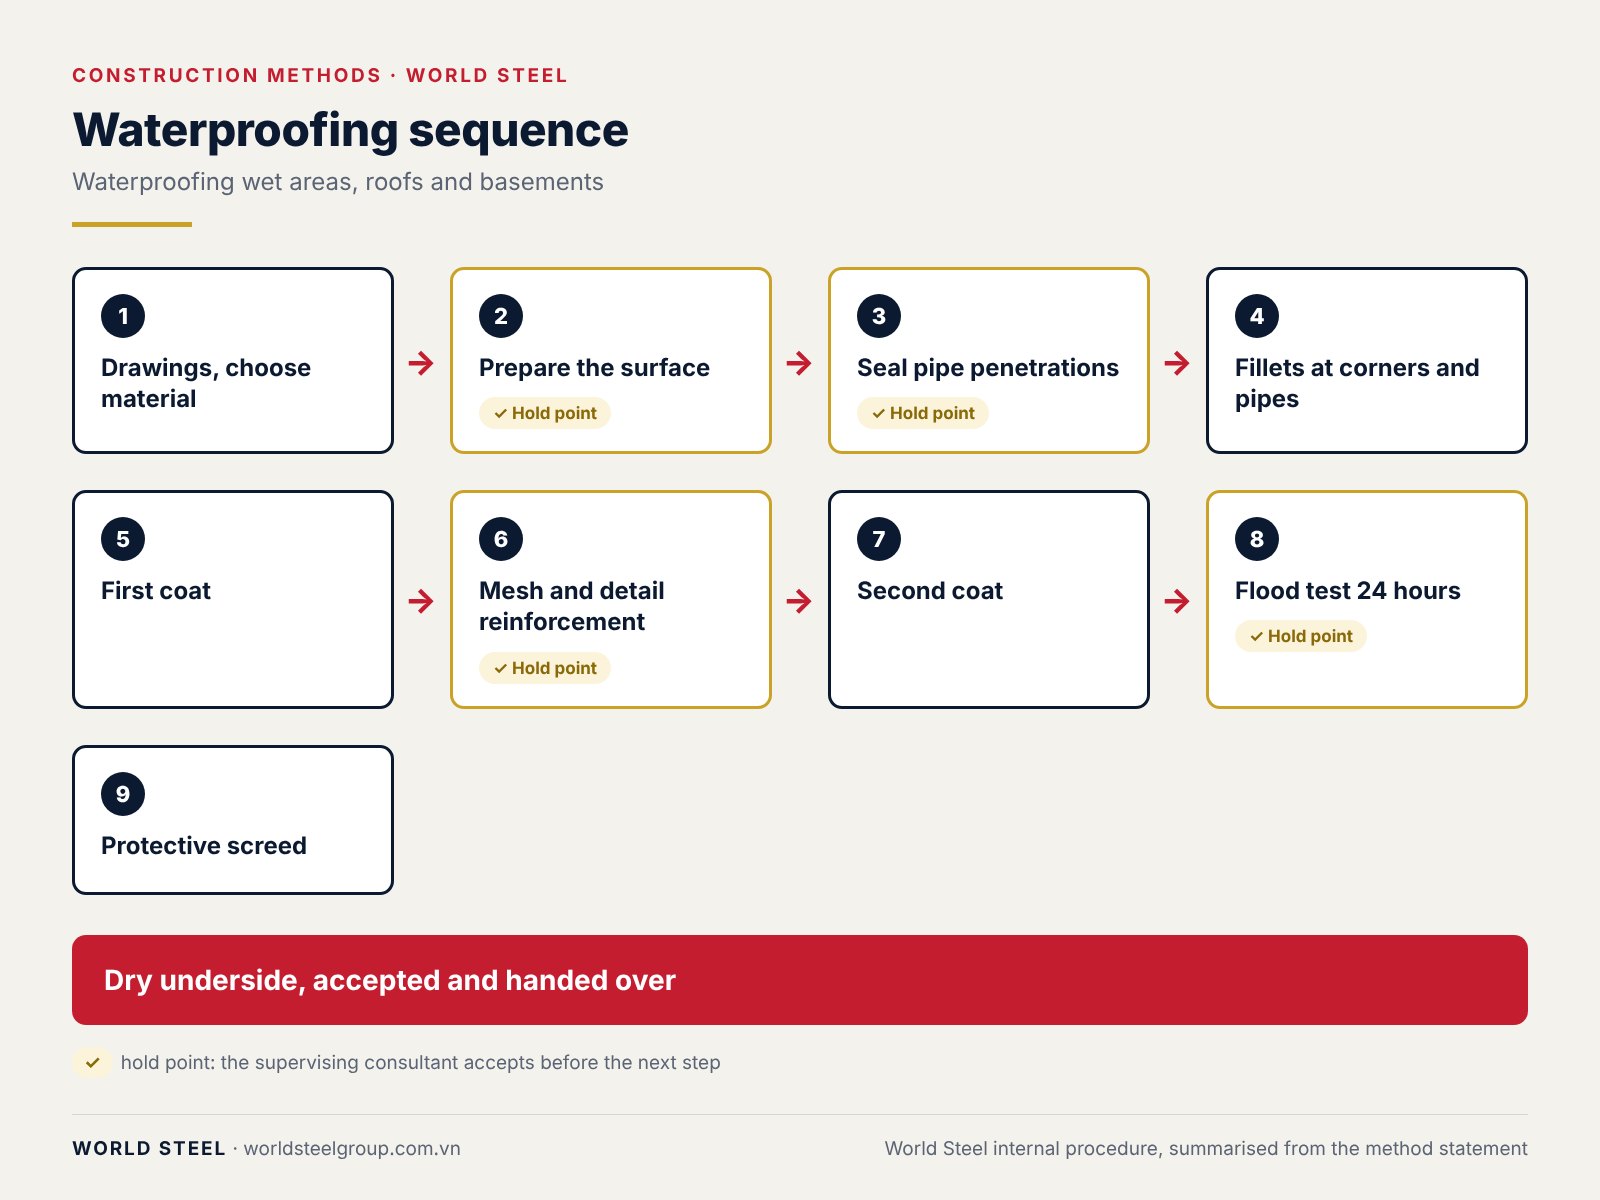
Every area in regular contact with water must be waterproofed: toilet floors, gutters, concrete roofs, water tanks, underground tanks, basement floors and walls, and machine foundations. World Steel chooses the material for each location and follows one sequence: surface preparation, detailing, waterproof coating, flood testing and a protective screed.
Choosing the material for each location
| Type | Suitable locations | Strengths and limits |
|---|---|---|
| Two-component cement-polymer | Toilets, balconies, gutters, small roofs, planters, water tanks | Cement-based, so suits damp areas; tears easily over cracks from temperature, vibration or settlement, so not suitable for large outdoor slabs, especially roofs. |
| Crystalline cementitious | Basement floors and walls, septic tanks, underground tanks | Works with the concrete, resists water pressure from both sides, seals non-moving shrinkage cracks and can be applied to damp surfaces; cannot seal cracks wider than 0.5 mm. |
| Bituminous membrane (cold-applied or torch-on) | Concrete roofs, large roof slabs | Accommodates movement better than cement-based coatings; needs a protective layer. |
Work sequence
| Step | Work | Control |
|---|---|---|
| 1. Drawings | Plans, waterproofing heights, material types; special details such as movement joints, machine bases and basement walls. | Material samples approved against the technical criteria. |
| 2. Surface preparation | Remove ridges, burrs and oil; cut off temporary bars; the surface must be dry. Roofs need a concrete upstand at the wall base at least 10 cm above the finished floor. | Check the slab level against the finished level and the falls to the drains. |
| 3. M&E pipes through the slab | Check all pipes are in; seal pipe penetrations with non-shrink grout. | Formal handover of the area with the M&E, door and railing crews. |
| 4. Corners | Form mortar fillets at wall corners and round pipe collars. | No sharp corners left. |
| 5. First coat | Cement-based: one coat over the whole area, 300 mm up the walls or as designed. Membrane: apply primer, wait for it to become tacky, then lay the membrane. | Shower walls waterproofed 1.2–2.1 m high; if the design omits this, propose it to the owner. |
| 6. Detail reinforcement | Cement-based: embed reinforcing mesh at wall bases and pipe collars and add two coats. Membrane: bitumen mastic round pipe collars. | Accept pipe collars before the next coat. |
| 7. Second coat | Cement-based: a second coat over the whole first coat. Membrane: sheets lapped at least 50 mm; cold membranes pressed down firmly, torch-on membranes heated until the bitumen flows and bonds. | Enough light so nothing is missed, enough ventilation for safety. |
| 8. Flood test | 24 hours after the last coat, flood the area; inspect the underside a day later. | Pay attention to pipe collars and penetrations. |
| 9. Protection | After draining, barricade and sign the area until the protective screed is laid. | No other trades walking on or storing materials on the waterproofing. |
Concrete roofs and basements
- Concrete roofs: apply waterproofing, flood test and lay a protective screed; then insulation boards, steel mesh, a 50 mm fine-aggregate concrete topping and finish tiles (to the designed build-up). Falls are formed when the roof slab is cast.
- Basements: waterproof the basement walls, then plaster columns, beams and walls, screed the floor and finish. Pay particular attention to the junction between the basement slab and the diaphragm wall.
Common mistakes
| Mistake | Consequence | Prevention |
|---|---|---|
| Poor surface preparation | Waterproofing peels or punctures, wasted material, leaks | Accept the surface, level it, cut off temporary bars |
| Slab level not checked | Clashes with the finishes, break-out and rework | Accept levels before waterproofing |
| Applied on a wet slab | Poor bond, hollow areas | Cut off water sources; dry with fans or a torch |
| Poor coordination with M&E, doors and railings | Rework when earlier items were missed | Follow acceptance and area handover |
| Waterproofing left unprotected | Scratches, punctures, rework | Barricades, signs and an immediate protective screed |
| No waterproofing at external wall–structure junctions in high-rainfall areas | Leaks through cracks after long rain | Propose it to the owner if the design omits it |
| Pipe collars badly detailed | Leaks round the pipes | Accept pipe collars separately; form falls to the drains when casting the slab |
Reference standards
The edition in force when the contract is signed applies.
- TCVN 9065:2012 Waterproofing materials – Bitumen emulsion paint
- TCVN 4453:1995 Monolithic concrete and reinforced concrete structures – Code of practice for construction and acceptance
- The approved technical instructions of the waterproofing manufacturer


