








この記事の本文は英語版を掲載しています。日本語訳は準備中です。
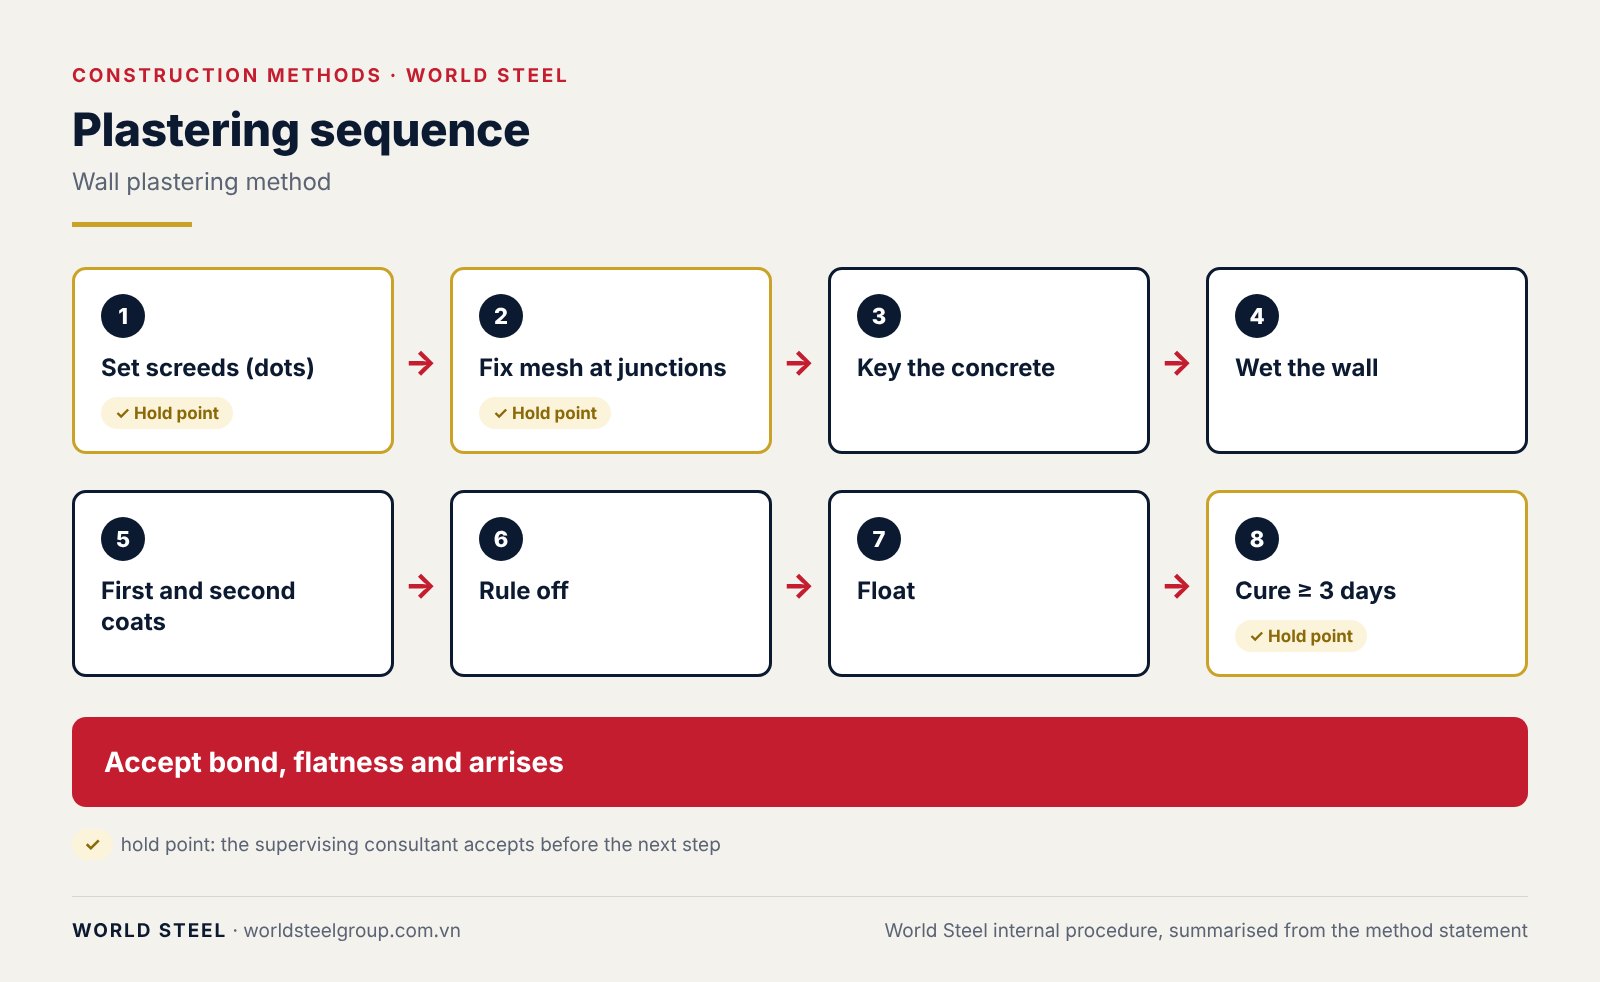
The plaster coat decides how flat a wall is before painting or tiling. World Steel plasters interior walls in a fixed sequence: screeds (dots), mesh, key coat, two-coat plaster, ruling off and floating, with acceptance by the supervising consultant at the screed stage and before the main plastering.
Preparation
- Drawings show the clear dimensions of every room; the plaster usually stops 5 cm or 10 cm above the false ceiling level (as designed); special details such as curtain recesses, set-backs and unplastered reveals have sections and notes.
- The mortar mix is tested and approved by the owner; a mixing table is prepared in site batching units (18–20 litre buckets or 40×40×25 cm boxes).
- Plaster only after conduits, socket and switch boxes and concealed water pipes are installed; box edges and pipe ends stand out by the plaster thickness.
- Remove dust and dirt, break out concrete bulges and fill large holes before setting screeds.
Work sequence
| Step | Work | Control |
|---|---|---|
| 1. Screeds (dots) | Chalk an offset line round the base of the walls (usually 300 mm out). Set dots top and bottom at the four corners; where a bulge cannot be broken out, use it as the reference (about 5 mm thick). Dots in rows 1.5–2 m apart, the first row 10–15 cm above the floor; smooth dots about 5×5 cm. | Check dot flatness with a plumb line and straightedge; at door openings, string a line along the frame face. |
| 2. Mesh | Fix steel mesh where masonry meets concrete columns, beams and walls and along M&E chases; at least 5 cm overlap each side, mesh openings no larger than 3 cm (usually 1×1 cm welded mesh). | Accept the mesh before plastering. |
| 3. Key on concrete | Spatter dash with 1:1 cement and coarse sand, or brush on a thin cement slurry and plaster when it starts to firm up; scabbling is rarely used. | Done alongside the screeds and mesh. |
| 4. Wetting | Wet the wall so the bricks do not draw water from the mortar; wet hollow bricks 2–3 times about 15 minutes apart until they no longer look pale. | Insufficient wetting causes poor bond or cracking from behind. |
| 5. Applying mortar | Lay boards or sheeting at the wall base to catch mortar. Apply the first coat within reach of the rule; when it firms up, apply the second coat so both are flush with the dots. Plaster a whole wall face continuously to avoid joints. | No coat thicker than 8 mm; thicker plaster is built up in coats with a key between them; ceilings 10–12 mm, thicker on steel mesh. |
| 6. Ruling off | When the mortar firms up, rule it flat off the dots; cut back high spots and rule once more. | Finish one section before moving on. |
| 7. Floating | Float from the top down; add water at joints and wait for wet areas to dry off; do not press hard, to avoid crazing. | Check corners with a square. |
| 8. Curing | Mist the wall 24 hours after plastering and keep it damp for at least 3 days. Use all mortar within the day; clean up at the end of the day. | No crazing. |

Acceptance criteria
- The plaster is firmly bonded with no hollow spots; tap to check, and hollow areas are broken out and replastered.
- The surface is flat, with no crazing, runs, tool marks or defects at arrises, skirtings or door bottoms.
- Arrises straight and sharp; corners checked with a square; window and door reveals parallel; sills at the correct fall.
- Arris deviation less than 5 mm over the full height of the element.
- Vertical deviation of the wall face relative to the ceiling less than 10 mm over the full length and width of the building.
- Surface irregularity: hollows less than 3 mm deep. Checked with a laser and an aluminium straightedge.
Common mistakes
| Mistake | Prevention |
|---|---|
| Dowel ends not cut, concrete bulges not removed before plastering | Accept the surface before setting screeds |
| No mesh at concrete–masonry junctions or where interior and exterior plaster meet | List the mesh locations on the drawings |
| Patchy spatter dash | Cover the concrete face evenly |
| Pale, powdery plaster because the bricks absorbed the water | Wet the wall properly before plastering |
| Uneven plaster height, top edge not cut straight | Chalk the plaster level and cut the edge to the line |
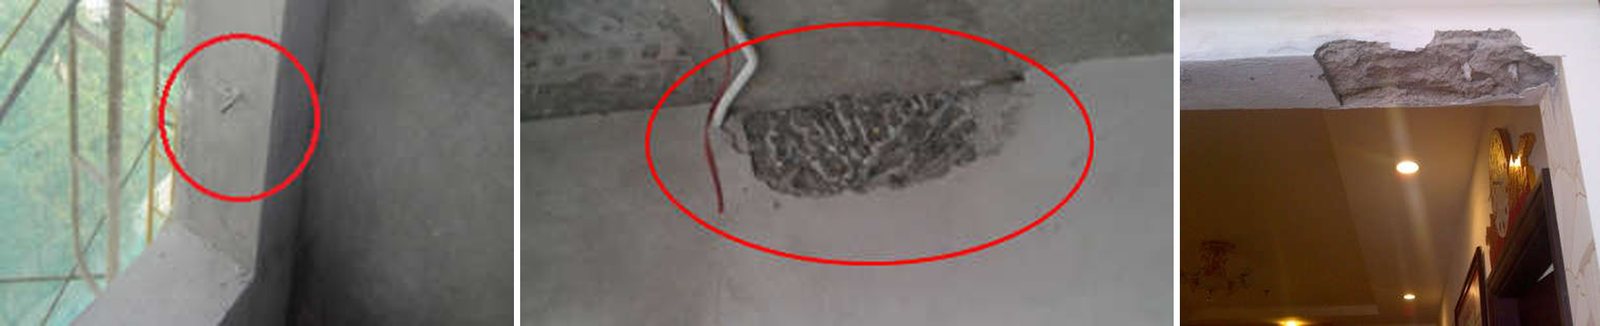
| Hollow plaster under lintels because it is too thick | Build up in coats, on steel mesh where thick |
| Wall flaring at the base because it was not cut back | Cut the base straight before the mortar sets |
| Cracks where scaffold holes were patched | Patch with the correct mortar mix and mesh |
| Socket boxes and pipes sealed with cement slurry | Seal with the specified mortar, not slurry |
Reference standards
The edition in force when the contract is signed applies.
- TCVN 9377-2:2012 Finishing works in construction – Execution and acceptance – Part 2: Plastering works
- TCVN 4314:2003 Mortar for masonry – Specifications
- TCVN 9202:2012 Masonry cement


